My
school recently purchased 30 palmOne Tungsten E handheld
computers. All of our previous handhelds each came
with syncing/charging cradles. However, only a cable for
charging and a cable for synching is packed in the box
with a Tungsten
E.
I
had to rethink how charging is done, since previously I
simply set up a “farm” of
14 cradles on my desk (all attached to a few power
strips on the floor). I set up enough cradles so that half
of the Palm m515s
could
charge
at
once. It
has
worked
out
nicely. If I set up the new Tungsten E cables in the
same way, I
would have a pile of black spaghetti all over my desk!
Being somewhat of a neat freak, I needed to find a way
to charge
at least
a dozen handhelds at once without the cable clutter.
Sure, there’s the TriBeam
Charging Station. It’s
a great way to not only charge, but to organize a set
of 30
handhelds.
It comes in a tabletop or cart form, but it’s very
costly, starting at $999. There’s also iGo’s
10-Slot Charging Cradle. Maybe I could just purchase
two of these? Well, iGo
doesn’t make one that is compatible with most newer
handhelds, including the Tungsten E. I knew I’d
have to come up with my own inexpensive solution.
I
had figured out that I wanted some sort of container to
place
all of
the power strips and bricks in. I was planning
to then
drill holes in the container so that only the ends that
plug
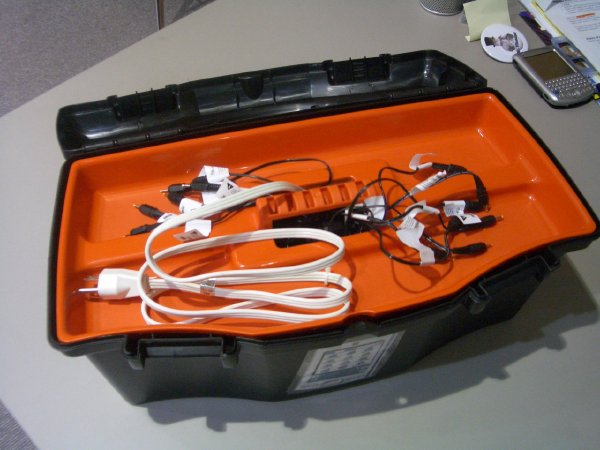
into the handhelds would be visible. Luckily, as I was
walking around Home Depot one Saturday, I noticed a sale
on toolboxes—$4
for a nice Black & Decker box. After opening it I
knew it was perfect for the multi-charger I wanted to
construct!
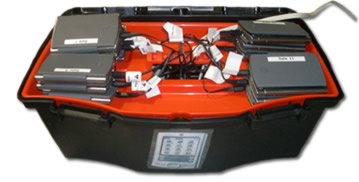
Here’s
what I did: I connected two power strips into an extension
cord. I plugged 12 Tungsten E power cables into
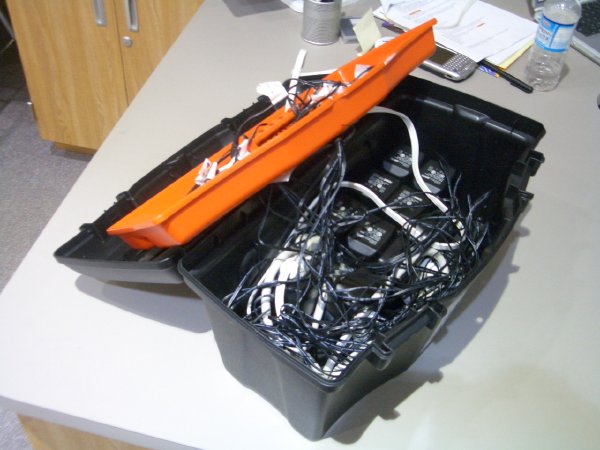
the power strips and placed them in the bottom of the toolbox.
I carefully organized the long cables so they wouldn’t
tangle. I pulled the ends of the cables and the end of
the extension cord through the handle hole in the upper
deck of
the toolbox. I taped the cords underneath the upper deck
so they wouldn’t slide back into the bottom. I placed
the upper deck of the toolbox on top of the power strips
and cable
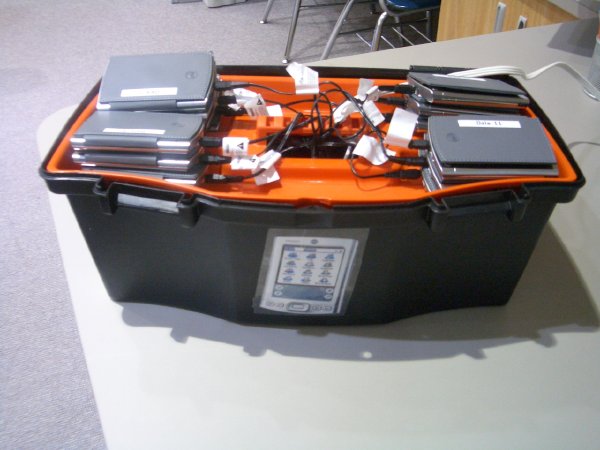
bricks. I now had a very inexpensive, portable, clutter-free,
multi-charger! I simply plug the handhelds into the ends
of the cables and place them on the top tray. I have one
extension
cord that runs from the box to a wall socket.
The
power supply bricks for the handhelds do get hot, so be
careful
if you make your own. I made sure I didn’t
put too many power bricks in the bottom of the box. I also
used
a heavy-duty, three-pronged extension cord and good power
strips. I don’t want to create a fire hazard. My
multi-charger toolbox is also great for classrooms where
students each
have their own handhelds. Having two of these
boxes would allow an entire class set of handhelds to
charge at once without having chargers plugged into every
spare
socket around the classroom.
For
less than $35, you can make your own toolbox multi-charger!
Click the photos on this page to see larger pictures
of my toolbox.
December
21, 2004
Also see a Basket Charging Solution. |