 Bringing iPods and iPads into the classroom is a great way to give students access to learning tools. However, there are so many things to keep in mind to make the devices work smoothly in the classroom. While this list of dos and don'ts mainly addresses iPod touch the same advice goes for iPod touch and iPhone.
The list is for large or small class sets of handhelds; if students are using their own personal iPods you'll have a different set of considerations and technical issues to deal with.
Dos
Do sync all devices to one computer. You'll really be doing yourself a favor by syncing with one computer. You can add media to one computer's iTunes Library and know that it will sync with all iPods. If you must use more than one computer for syncing, always sync the same group of iPods to the same computers. This will probably involve color-coding the iPods and computers. The one computer you sync with can be Windows or Macintosh. Some people report that Windows computers freeze when syncing more than a few iPods at once. Macs appear to work better at syncing multiple iPods simultaneously.
Do name devices. The first time you sync an iPod you are prompted to give it a name in iTunes. Start the name with a number so iPods are listed in order under the Devices list. Include a zero in front of number 1-9 so the computers sure to list them correctly. You can always change an iPod's name anytime using iTunes.

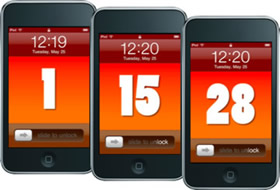
Do set each device's wallpaper with a number or name. An innovative way to identify iPads and iPods touches is to set the wallpaper image of each device to include its number or a name. This way you can simply press the Home button and the screen instantly lights up and displays the device's number. Wallpaper can be any image that's in the Photos app. That includes images synced using iTunes or images saved from mobile Safari or other apps. I've made three sets of images that you're welcome to use as wallpaper. Read my post and download the image sets.
Do set iPads and iPods for automatic sync of all content. Configure each iPod to sync all audio, video, podcasts, and apps so that everything in the iTunes Library is automatically transferred to the iPod. This way there are no buttons to push or click. Simply plugging in the iPod will ensure that everything in the iTunes Library is synced onto the iPod. Refer to this PDF for directions. Each iPod will have to be configured separately in iTunes. But, once configured, you won't have to touch the settings again.

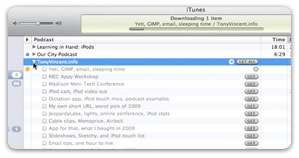
Do make playlists. Because everything in the computer's iTunes Library will be synced onto the iPods, it's a good idea to organize what you want students to access into playlists. Do this by click the + in the bottom-left of the iTunes windows. Name your playlist and then drag and drop audio, video, podcasts, and audiobooks onto it. You can click and drag to reorder items within a playlist. Upon next sync, the playlist will appear on the iPod.

Do delete content. Since you are mirroring the computer's iTunes Library onto the iPods, deleting items from iTunes will delete them from the iPods. After you no longer have a need for a podcast, video, or audiobook, delete it so it is not taking up room and cluttering up the iPods. Chances are you want to use this content with a future class. If it's something you will use again, drag and drop it into a folder on your desktop. You can drag and drop it back into iTunes for the next time you want it synced to iPods.
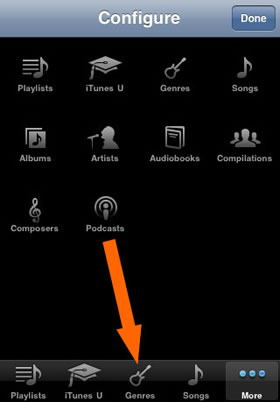
Do configure the Music app for easy access to playlists and podcasts. I wish the Music app on iPod touch was named Audio instead because that is where you listen to any audio and access podcasts. As its name suggests, the app is set up for listening to songs. With a few changes, you can make it easier for students access educational content on the iPod. First, launch the Music app and tap the More button. Then tap Edit. Drag the Playlists, Podcasts,and iTunes U buttons to the bottom of the screen. If you use audiobooks you can drag that too. You'll need to do this on each iPod touch (or better yet have students do it). Now when the Music app is launched, students have quick one-tap access to whatever buttons you added to the bottom of the screen.
Do label or engrave devices. It's important for teachers and students to be able to identify iPods. Giving iPods numbers is helpful. Some schools engrave numbers on the iPods' backs. Unfortunately, this number cannot be seen when the iPod is in a protective case. Putting a sticker on the front or writing the number on the case is helpful. Be sure the number matches the number you gave the iPod in iTunes. Additionally, having a variety of colors for cases can make it easier for students to spot their iPods.
Do set up an iTunes account for the classroom computer. Most prefer to keep their personal iTunes account separate from their school account. Now, you do not need an iTunes account to download podcasts and iTunes U collections. You do need an account if you plan to download audiobooks and apps, even if you are will only download free apps. iTunes usually requires a credit card to be on file when you create an account unless you follow these directions. You can sync all of the iPods using that one account. Everything you download with that account will be locked to that account and can only be installed from computers that are authorized with the account's Apple ID and password.

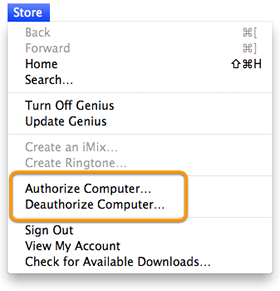
Do know you can authorize more than one account on a computer. If you bought software using a different account from your classroom account, it is possible to also authorize your account in addition to your school account ron the classroom syncing computer. Click Authorize Computer from iTunes' Store menu and enter your Apple ID and password. Realize that you can authorize an account on up to five computers. When you deauthorize your account on the computer the apps and audiobooks that are associated with your account will be deleted from the iPods.
Do get a charging cart, case, or tray if you have the money. Bretford makes the PowerSync Cart for iPads and for iPods. It's pricey at about $2500. For about half the price they offer the PowerSync Case for iPods. Also, PARAT Solutions makes Parasync, and they have created a product comparison chart. Here's a sync-charge cart and station comparison chart for iPad. An advantage to these solutions is that each device has its own slot. Numbering these slots allows the teacher to quickly see which devices are missing. If you cannot afford a cart or case, do buy a couple of powered USB hubs so you can sync and charge several iPods at once. Note that very few USB hubs are powerful enough to charge iPads. If you stagger connecting the devices, you can sync and charge an entire class set without buying expensive equipment.

Do have procedures for passing out, turning in, and syncing. Will students get their iPod as they enter the classroom? Do you have a helper student who will pick up the iPods? How will you know when all iPods have been turned in? There are lots of ways teachers manage iPods in the classroom. The key is having procedures for everyone to follow.
Do secure iPods when not in use. Have a place to lock up the iPods. It's no fun when an iPod is stolen.

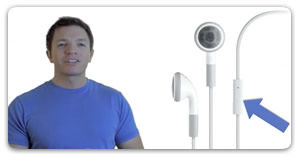
Do have earbuds for each student. Something else that isn't fun is using earbuds that someone else has stuck in their ears. You can get inexpensive earbuds at Walmart and online. Most students probably already have their own earbuds. Earbud wires do tend to get tangled. Those in elementary classrooms may consider putting a hook on a wall for each student. Label the hooks and earbuds so students can drape their earbuds from the hooks when not in use as a way to keep the wires tangle-free.

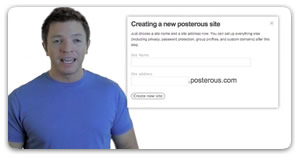
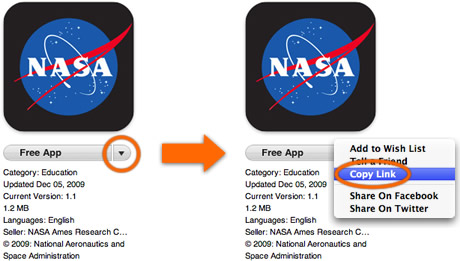
Do create a web clip icon for your class or school website. A web clip is an icon you can add to your Home screen as a shortcut to a website. With one tap, Safari will open to the web clip's page. To make a web clip, simply open the page in Safari. Tap the Plus sign at the bottom of the screen. Tap Add to Home Screen and edit the title (if you want). Tap Add and, presto, a new icon is added to your Home Screen. This will need to be done on each iPod individually. Adding a web clip to your class website enables you to add a link to your site that students can easily access on their iPods without typing in a web address.

Do use a URL shortener. If you don't have a class website or don't have time to update it, give wen addresses for students to type in using a URL shortening service. Sites like tinyurl.com and bit.ly take longer web addresses and make them shorter. The shorter the URL the easier they are to type on an iPod touch. Read more about shrinking long web addresses.

Do have consequences for misuse. Unfortunately, students will be tempted to use iPods inappropriately. I've found that taking away the iPod is an effective consequence for misuse. Students who have continual problems with misuse should be seated so that the teacher can monitor their activities. Maybe even point a video camera on a tripod at the student's screen so that the student knows the teacher is always "watching."
 Do create a usage contract. A contract is an effective way to communicate how and when an iPod can be used. Have students and parents sign the contract to indicate they agree to follow the rules and accept the consequences for breaking the rules. You may want to model your contract after some of these:
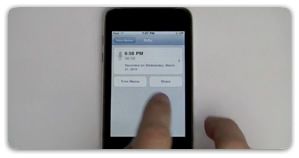
Do set up email.. Like it or not, email is the primary way to get some information off the iPod and onto a computer. If students are assigned their own iPods, then it makes sense to set up each iPod with the student's email account. Some schools use Gaggle.net email, which can be configured to work on iPad and iPod touch. If students do not have their own email or students share individual iPods, you may want to set up each one with a free Gmail account. The problem with setting up all those accounts is the time involved and the difficulty in monitoring so many accounts. An alternative is to create one Gmail account to be used on all devices. So that you can tell which iPod an email originated from, type in the number of the iPod or the name of the student in the Email settings Name field. This will need to be set up individually on each iPod. Additionally, be sure the teacher's email address is added to the address book so students can easily send what they create to the teacher. Read more about setting up Gmail on iPad and iPod touch.

Don'ts
Don't give students the iTunes account password. If you give them the password, they can download apps right from the iPod itself. Apps downloaded on one iPod will eventually be synced to all iPods so a single problem could grow larger. Teachers should be in complete control over what is loaded on the devices, so they should keep passwords to themselves.

Don't sync iPods with any other computer than the original. If an iPod is attached to a different computer you will get messages that content on the iPod will have to be erased. You probably don't want that. If you click Cancel, the iPod will charge but won't sync.

Don't feel you need to sync devices everyday. Chances are you won't need to sync iPads and iPod touches everyday. You only need to sync when there are new podcasts, audio, video, or apps you want to put on the iPods. If you plan ahead, you can make it so syncing is required only weekly and perhaps monthly. Depending on use, however, devices will probably need to be charged every couple days.
Don't spend too much on the devices. The 8 GB iPod touch is the most affordable. Is 8 GB enough? For most, yes, 8 GB is plenty for dozens of apps, lots of audio, and a few videos. You can see how much of the available memory is taken up by viewing each iPod's capacity gauge. The gauge is found in iTunes under the Summary tab for each iPod.

Don't buy expensive accessories. Apple sells $30 earbuds with microphones, $30 cases, $20 syncing cables, and $30 wall plugs. Monoprice sells $4 earbuds with microphones, $1 cases, $2 syncing cables, and $4 wall plugs.

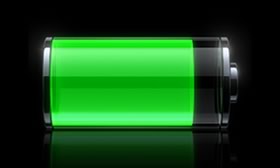
Don't mistreat batteries. iPod and iPad use lithium-polymer batteries. These batteries will lose capacity over time. The worst thing you can do is store iPods somewhere hot, like a car in the summertime. It's also not healthy for lithium-ion batteries to be completely discharged. For healthiest batteries, store devices at about 80% charge over the summer (be sure to completely power down the devices over the summer as well).
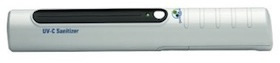
Don't use liquids to clean the screen. You don't want liquid getting inside. Microfiber clothes clean the screens nicely. If the screen is really gunky, put a small amount of water on a cloth and then clean the device. Apple does not recommend using any chemicals on the screen. So, to sanitize devices, I suggest using a UV light like Germ Gaurdian UV-C Light Wand.
Don't put up with a glitchy iPod. iPods can easily be restored to factory settings if something gets out of whack (or if a student decides to lock the iPod and forget the password). Read about restoring.

Don't forget professional development. There's always something new to learn when it comes to teaching and learning with iPods. Consider booking a workshop with me, Tony Vincent, and my workshops can even be attended by students. Don't forget that I offer a podcast for iPod-using educators. Additionally, there are plenty of other great websites out there where educators are sharing their iPod touch activities, ideas, and resources.
I'm hoping to make this list as thorough as possible. I will update this list with your suggestions so leave them in the comments.


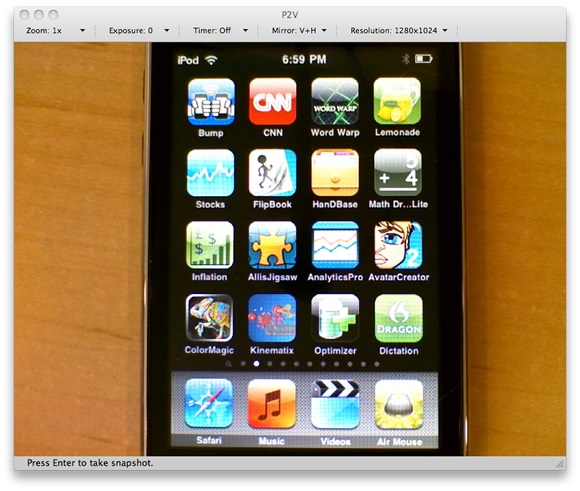
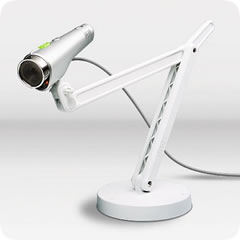 Unless you're willing to jailbreak your device or you're Steve Jobs, there's not a way to directly pipe your iPod touch, iPhone, or iPad's screen into a computer or projector. Teachers who use these devices with students would love to have this feature. Direct video from a handheld or slate allows for crisp, crystal-clear, and glare-free video of the the device. This could be projected on the wall so the whole class can see what's on the small device.
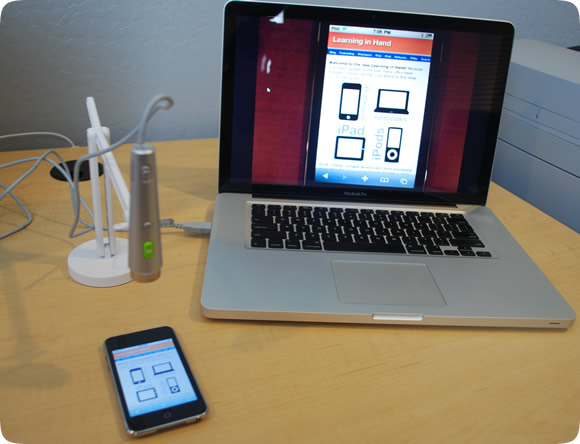
 Tony Vincent


 My favorite software from GoKnow,